
CANDO Project Center · Spring Hill, Tennessee
Fixing Multiple Runoff Paths Across a Gravel Driveway in Spring Hill, TN
Defined runoff paths, a corrected existing culvert, and a gravel driveway rebuilt around the drainage.
- Location
- Spring Hill, Tennessee
- Project Type
- Residential drainage + gravel driveway correction
- Upper and middle driveway / house-side swale
- Approximately 35,000 sq ft
- Lower driveway / existing culvert and overflow route
- Approximately 74,000 sq ft
- Existing Culvert
- 12-inch corrugated pipe excavated and reset
- Finished Surface
- Crusher run over suitable reused subgrade
This Spring Hill property had a problem that looked like a gravel-driveway problem at first, but the driveway was really just showing the symptoms.
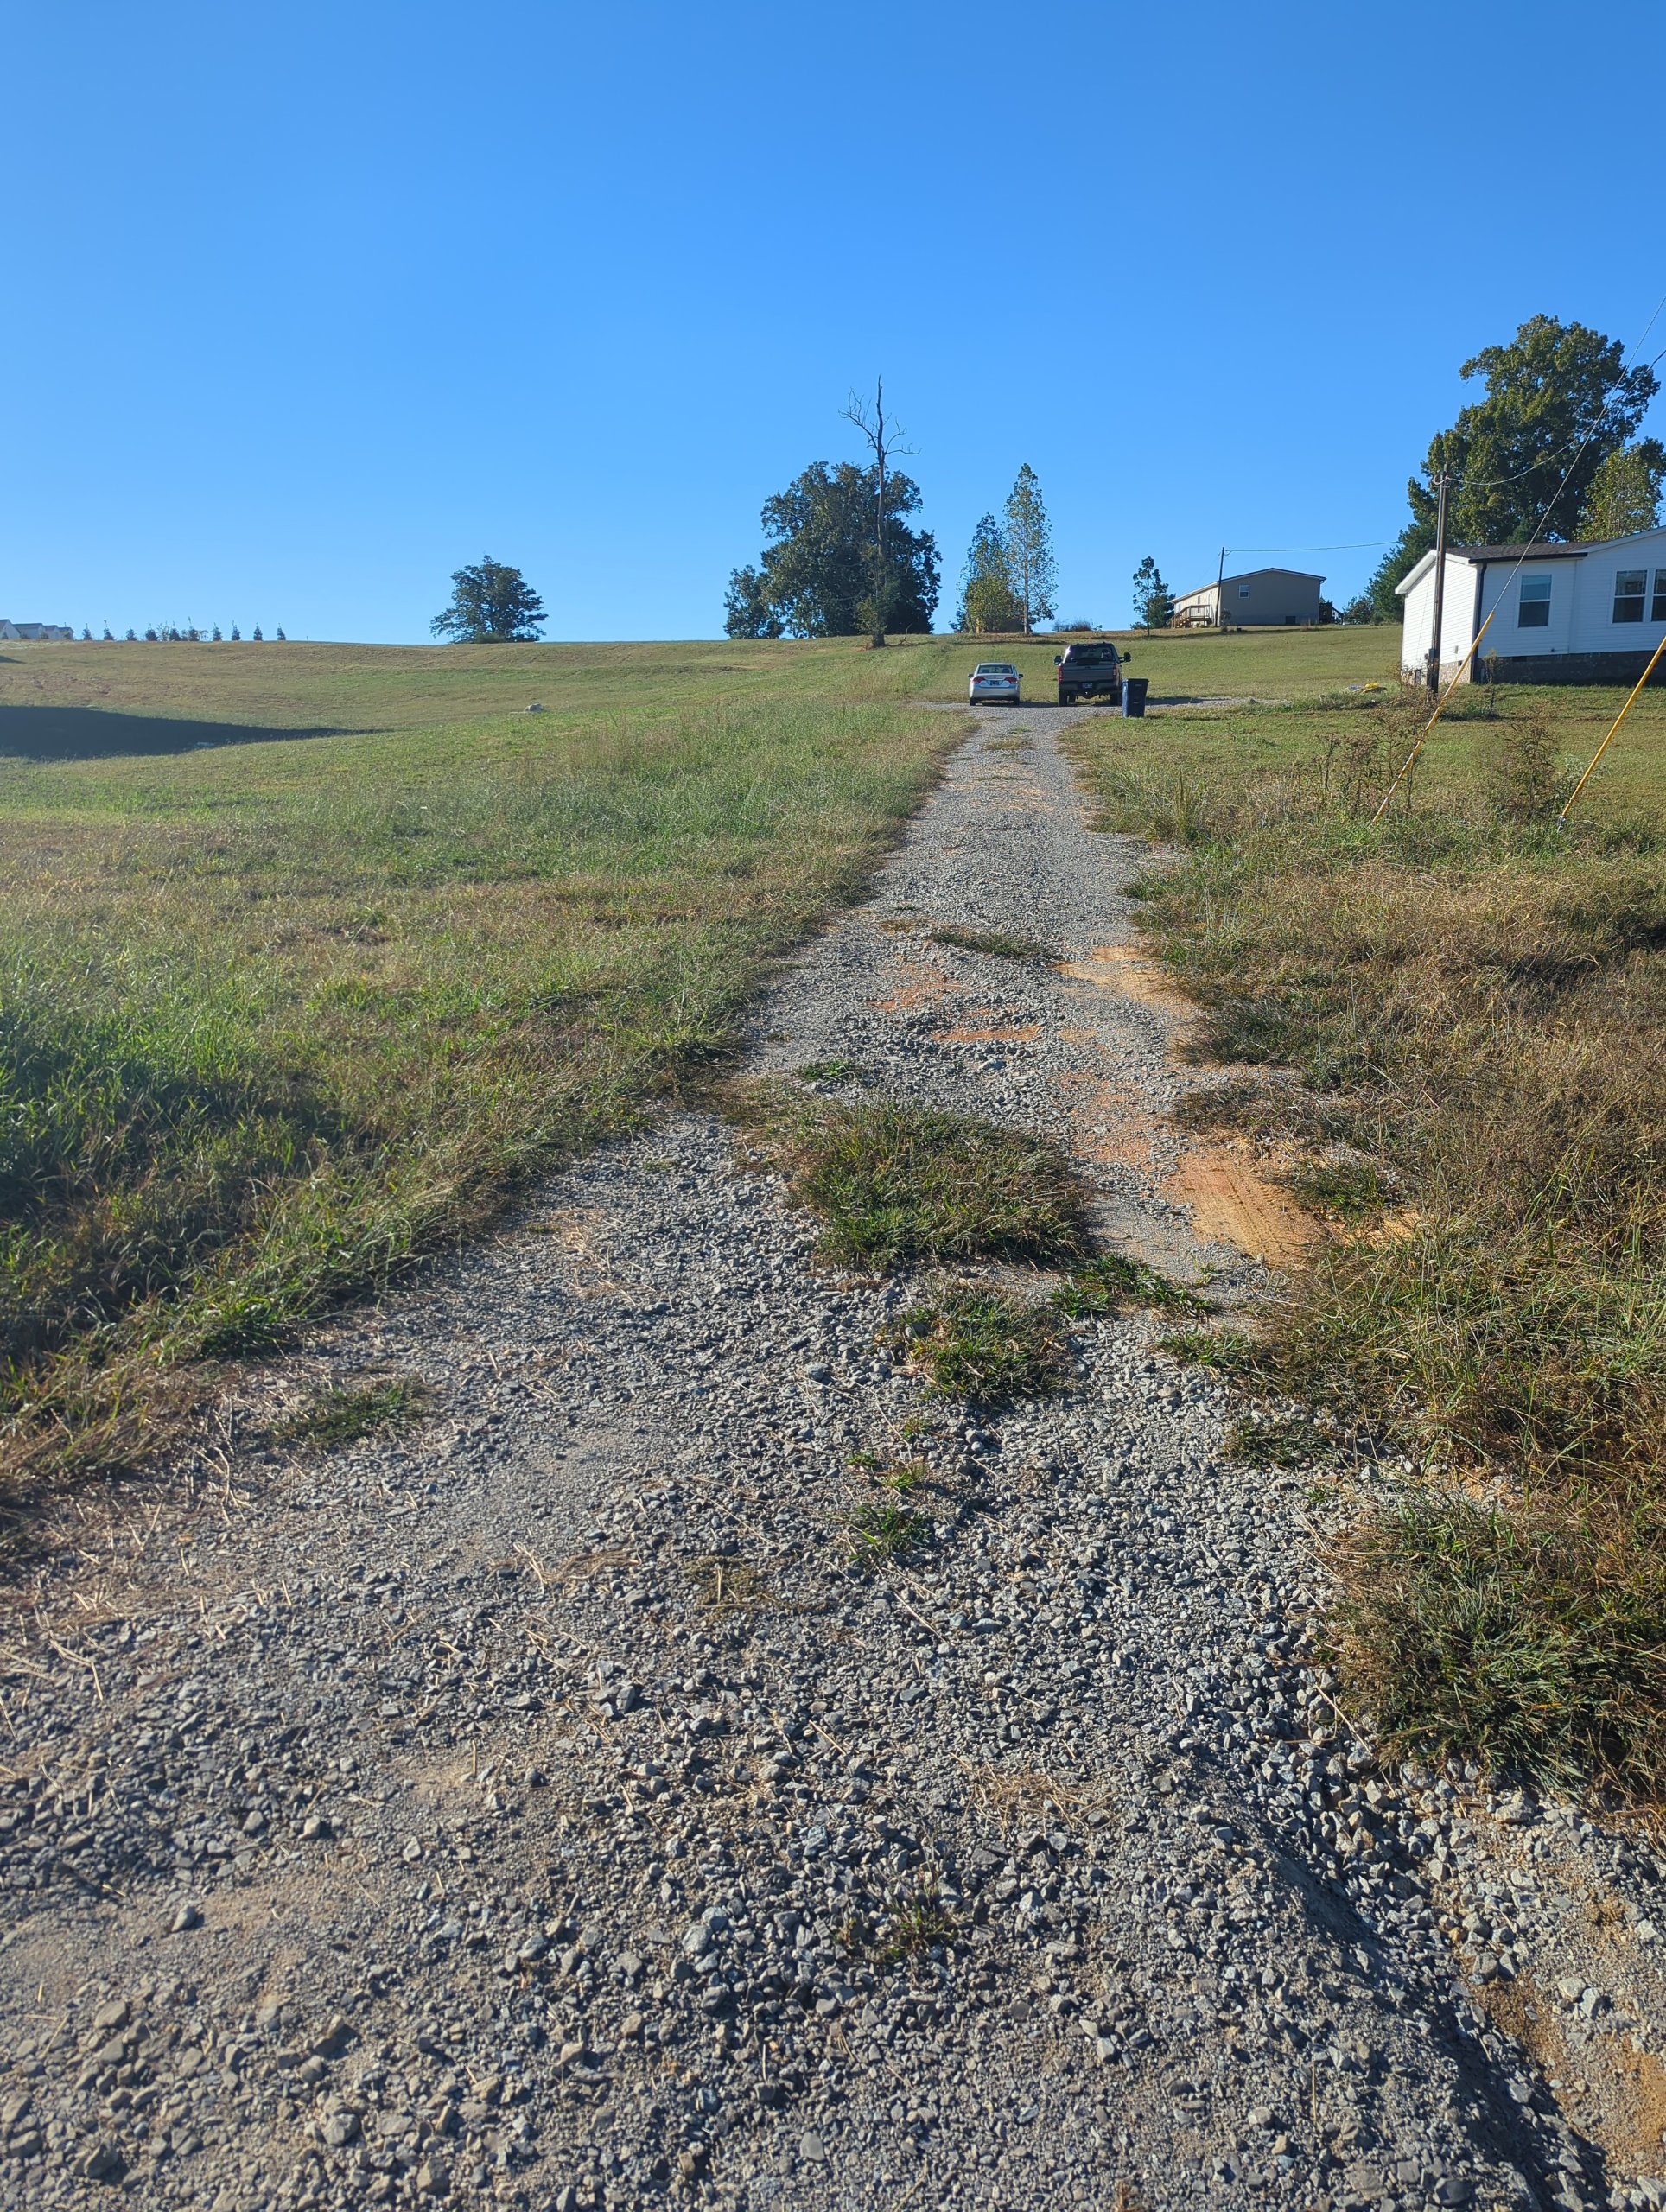
Water from a large uphill drainage area was reaching the property in several different places. During heavier rain, runoff was crossing the long gravel driveway, cutting channels through the stone, washing material downhill, and continuing toward the roadside ditch.
The homeowners were considering eventually investing in a more permanent driveway surface, but before spending money on concrete or pavement, the water needed a better path.
For CANDO, the job started with figuring out where the water was actually coming from and where it naturally wanted to go. That is the starting point for our drainage solutions.
The Original Problem
The sloped residential property sits below a broad area with significant offsite runoff. The homeowners originally described neighboring runoff draining onto the driveway.
During the site visit, I broke the drainage into two main contributing areas:
- Approximately 35,000 square feet — upper and middle driveway / house-side swale.
- Approximately 74,000 square feet — lower driveway / existing culvert and overflow route.
That is about 109,000 square feet, or roughly 2.5 acres of evaluated contributing surface area in total, but it was not one single watershed or drainage basin. The two areas followed different drainage paths and were not all entering the property in one place. Estimating contributing stormwater area helps explain why those separate paths matter.
In the upper portion, runoff was entering directly into the driveway instead of staying in a defined swale. Farther downhill, runoff from neighboring grading was supposed to enter an existing drainage path and culvert. During heavier storms, that swale could overtop and send overflow across the driveway closer to the road.
At the bottom of the property, the roadside ditch was also experiencing significant erosion. Simply adding more gravel would not have solved any of those problems.
What We Found at the Existing Culvert
An existing 12-inch corrugated driveway culvert was part of the lower drainage system. The pipe itself was already there, but the installation was working against the surrounding grade. It was set too low and pointed in the wrong direction relative to the drainage path.
That created a poor transition into and out of the pipe and made it harder for the surrounding ground to carry runoff cleanly through the crossing.
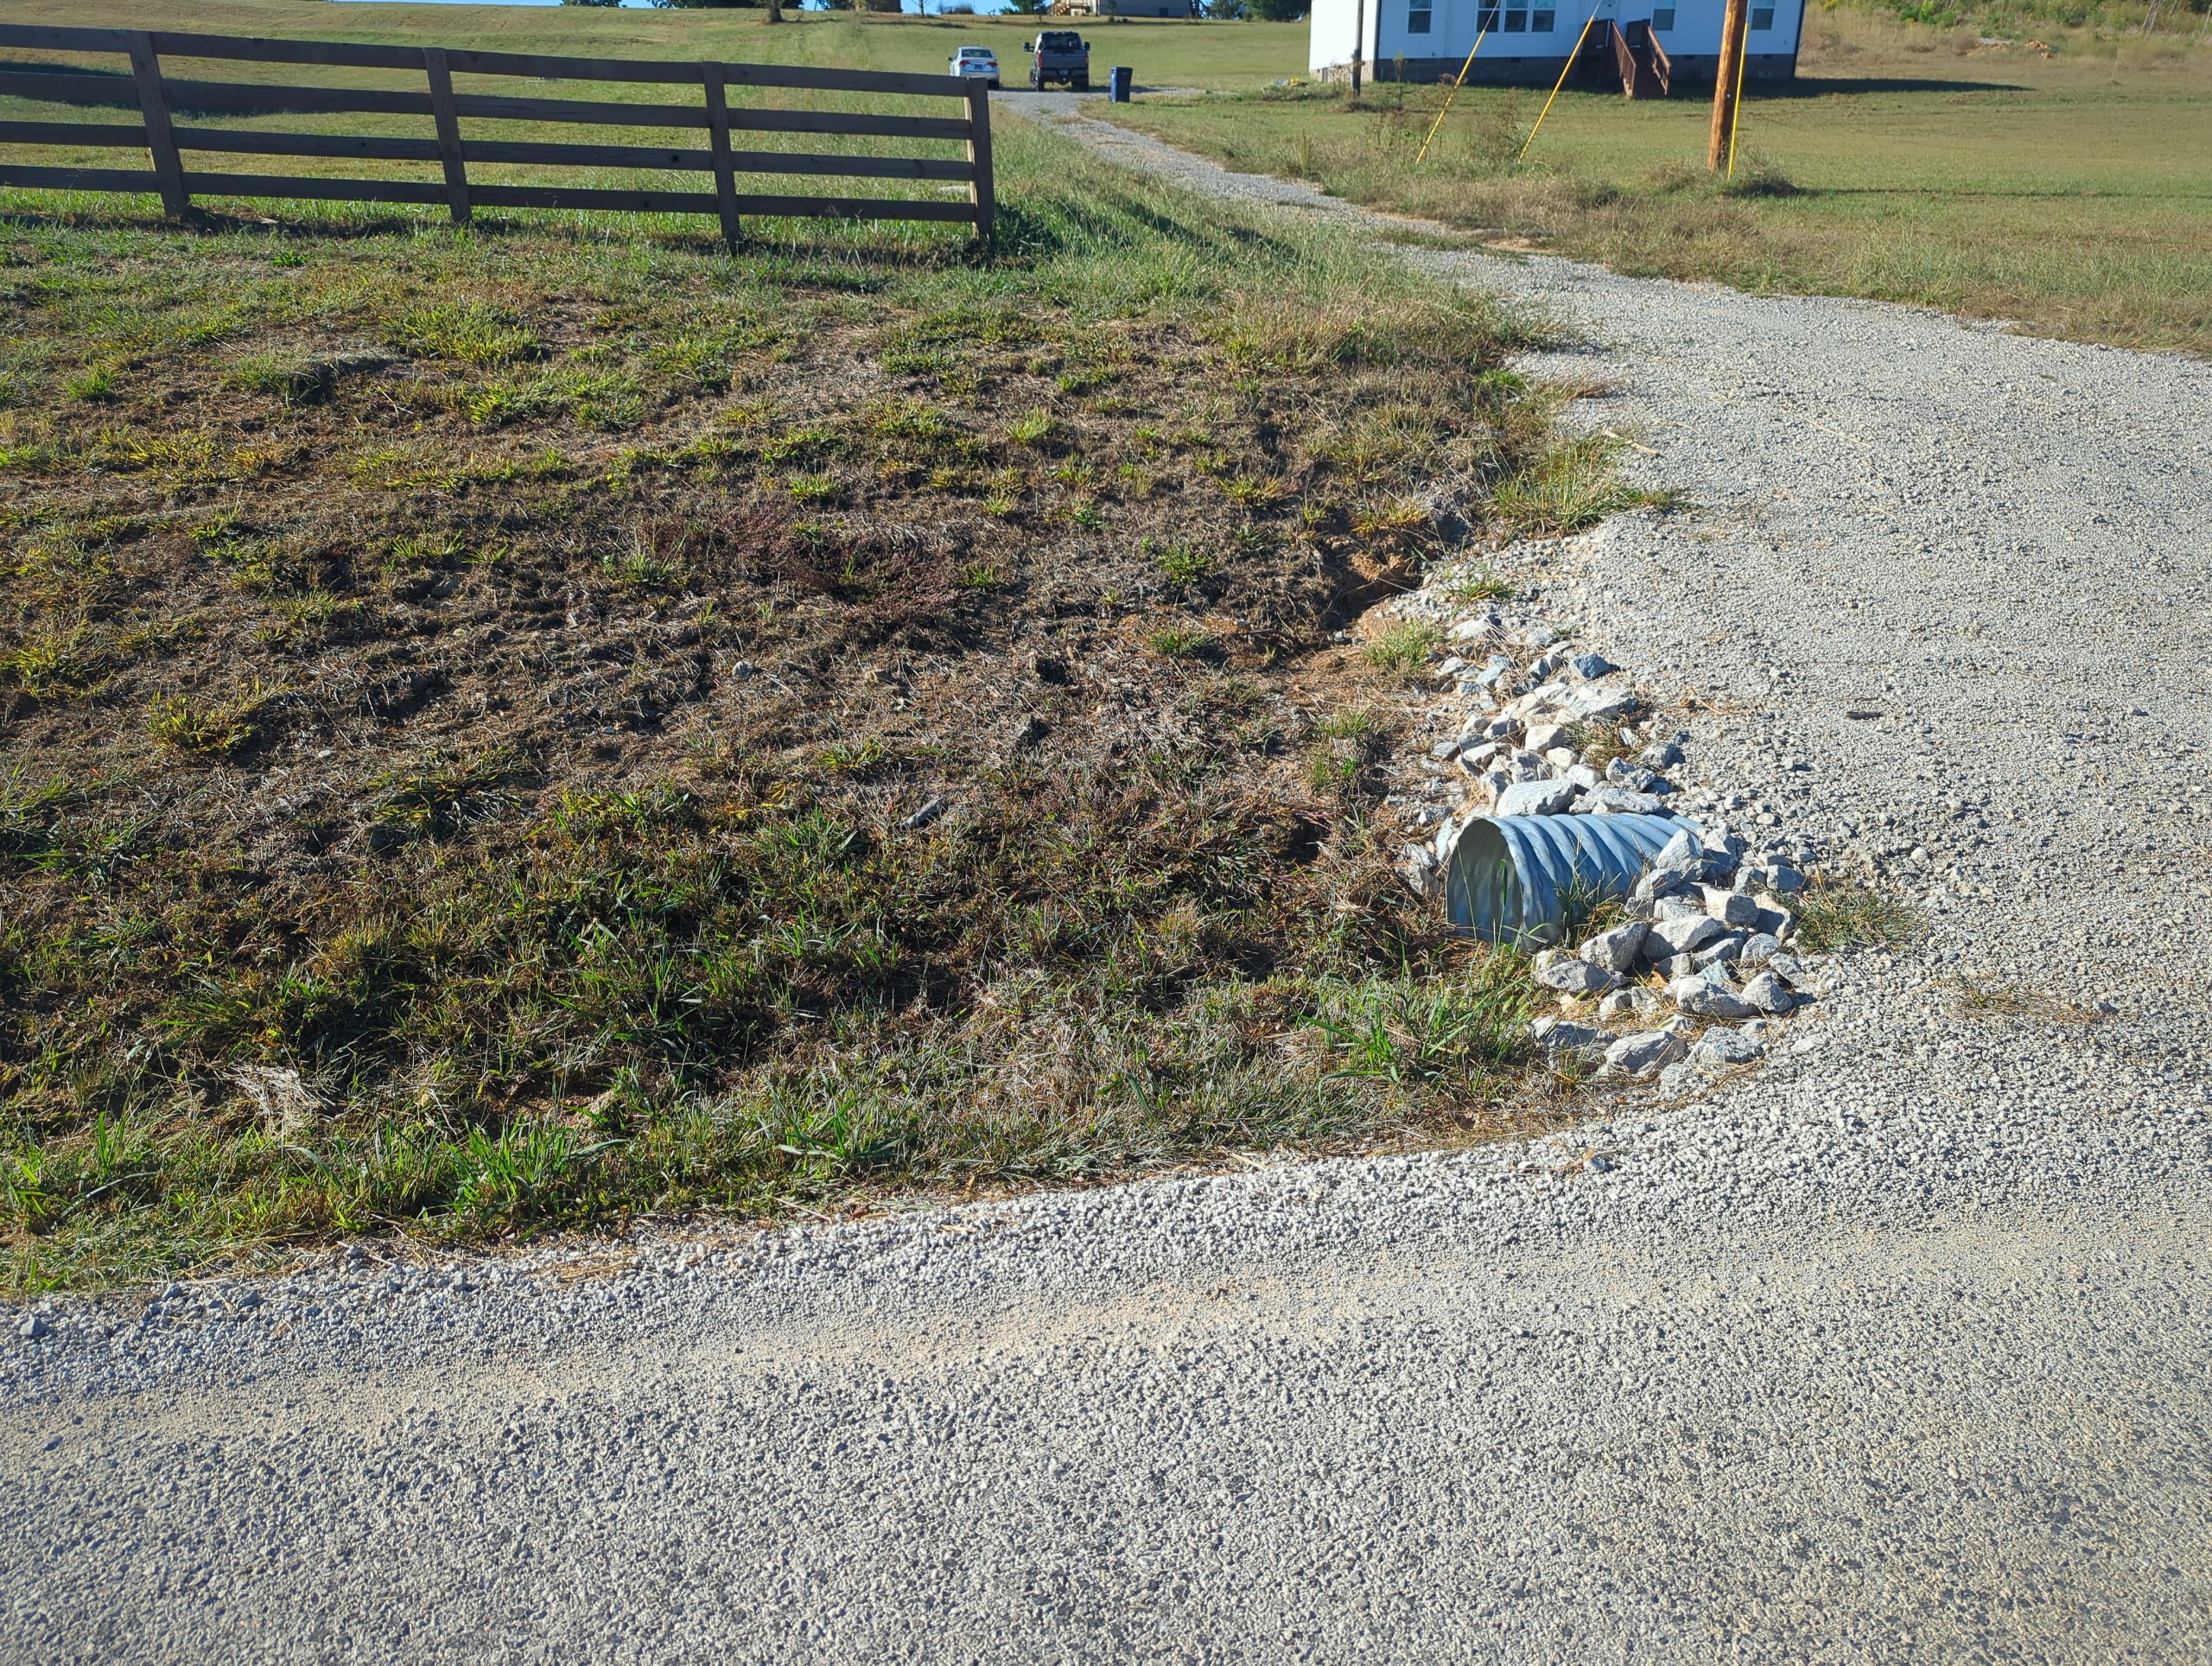
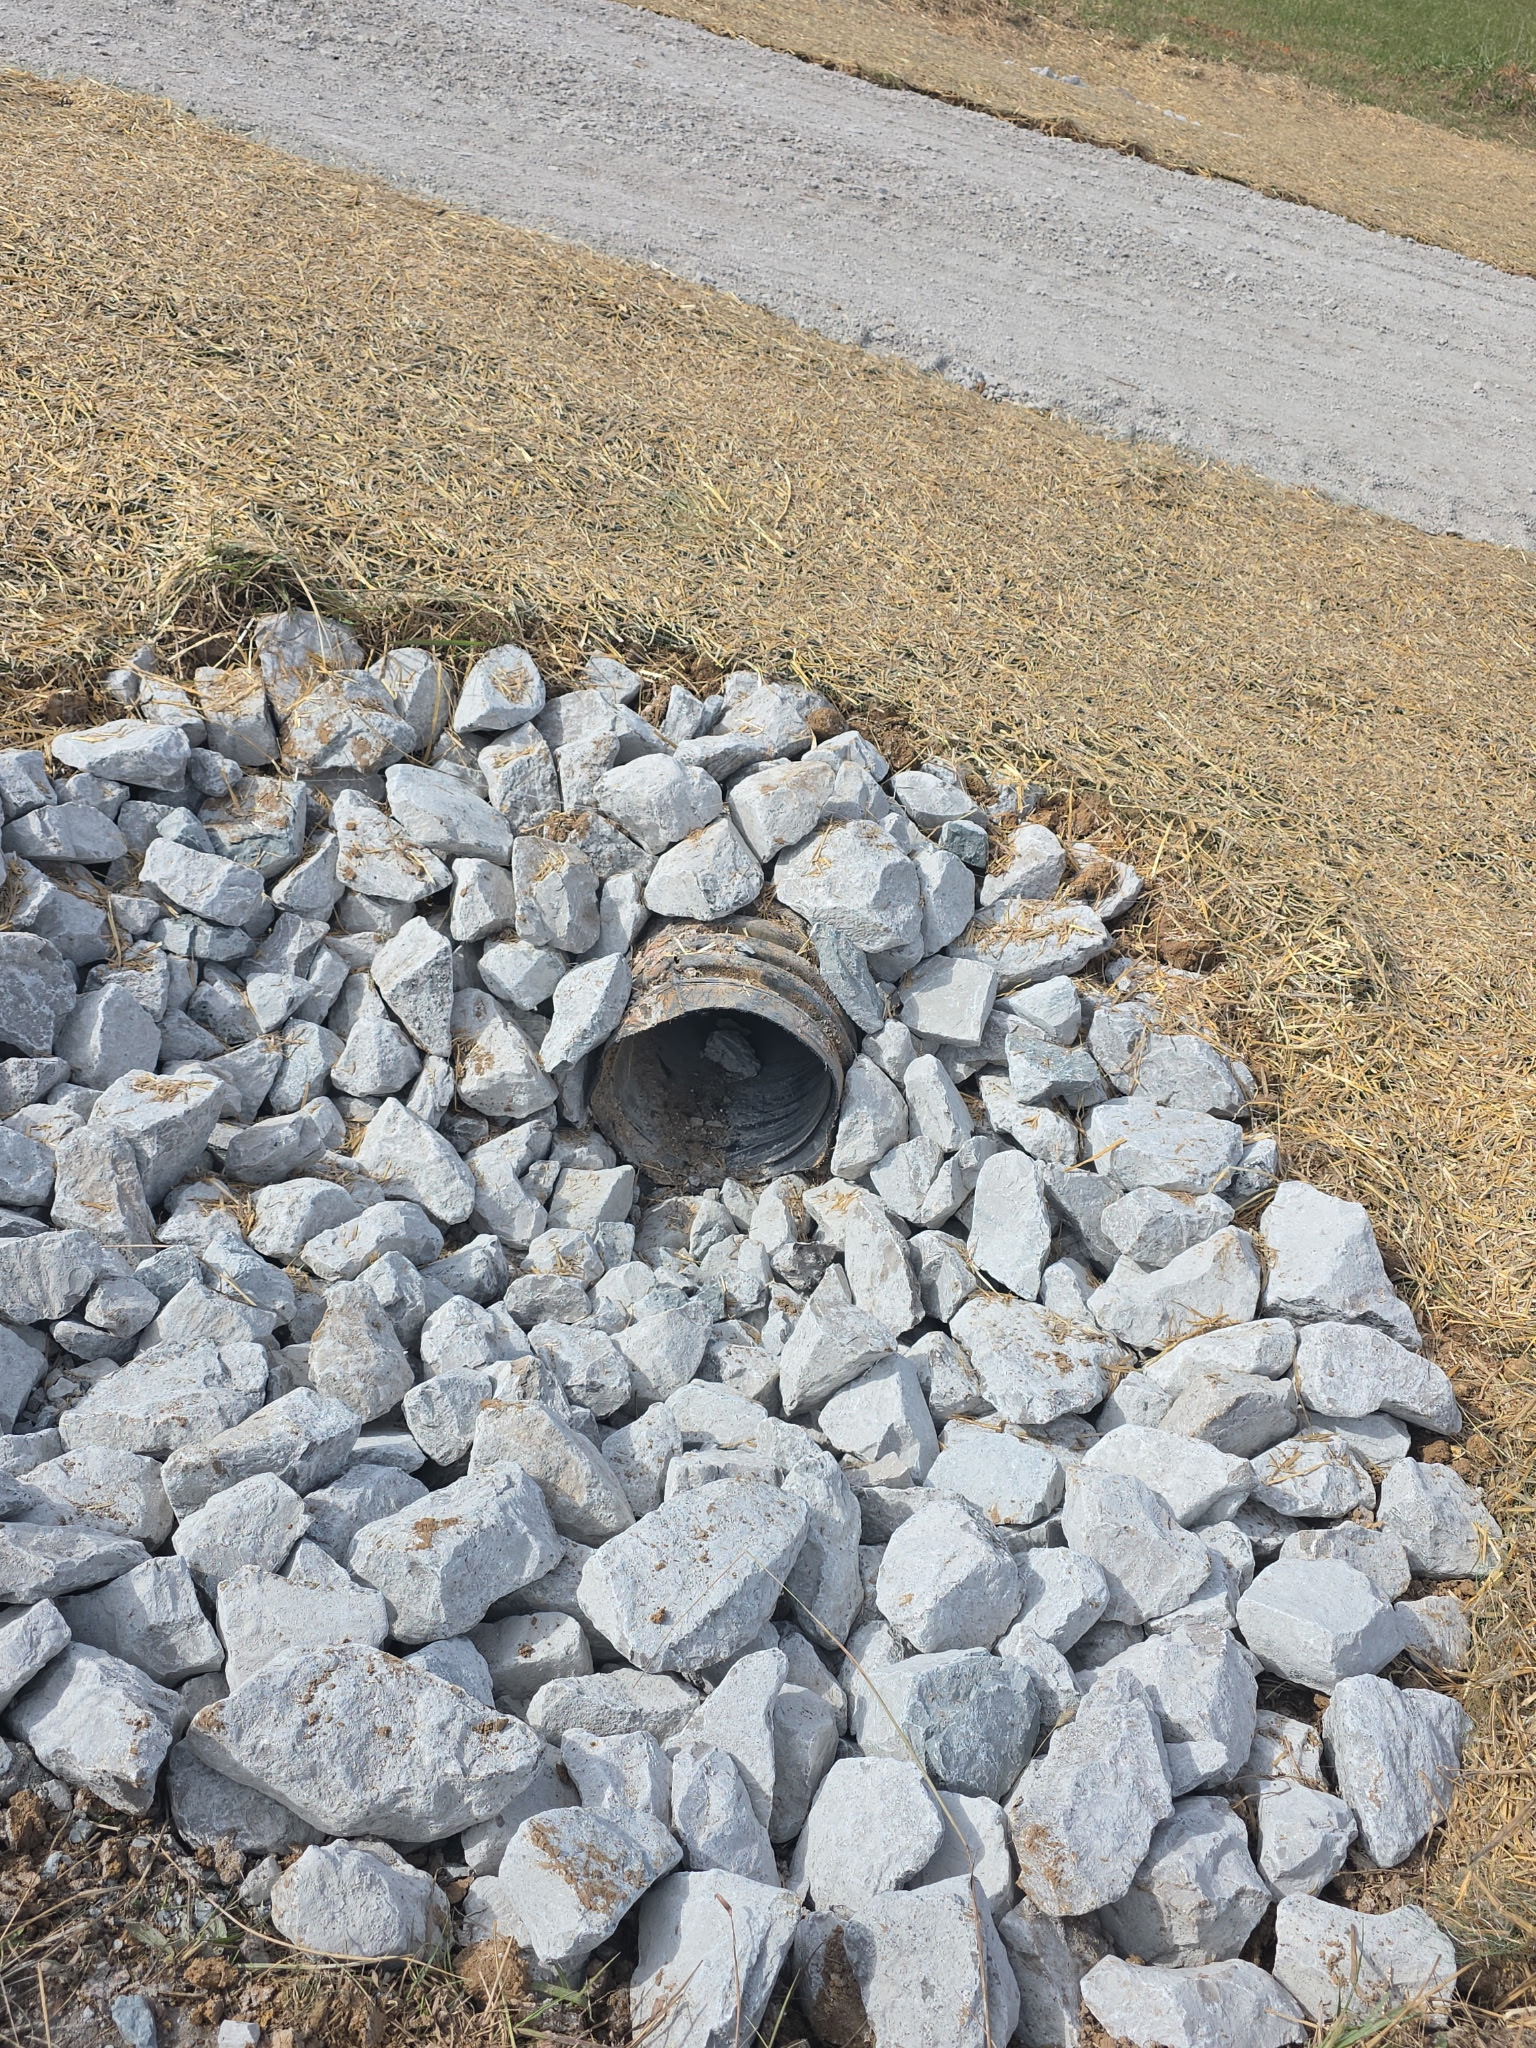
Rather than burying the problem under more stone, we excavated around the existing culvert, reset that same pipe to work with the surrounding grade, and reshaped the inlet and outlet. Riprap was added around the drainage area to reduce erosion and help stabilize the flow path.
This was a field correction to the existing pipe’s elevation and alignment, not a claim that a 12-inch pipe is sized for the full 74,000-square-foot contributing area or for every storm.
Creating a Defined Drainage Path Near the House
The upper drainage area was contributing approximately 35,000 square feet of surface runoff toward the driveway. The goal was not to send that water somewhere completely different. The goal was to give it a defined route before it reached the gravel.
We reshaped the upper portion of the property and created a swale beside the house. The planned swale was approximately 40 feet long and 5 feet wide. Riprap protected the higher-energy section, with geotextile beneath designated riprap.
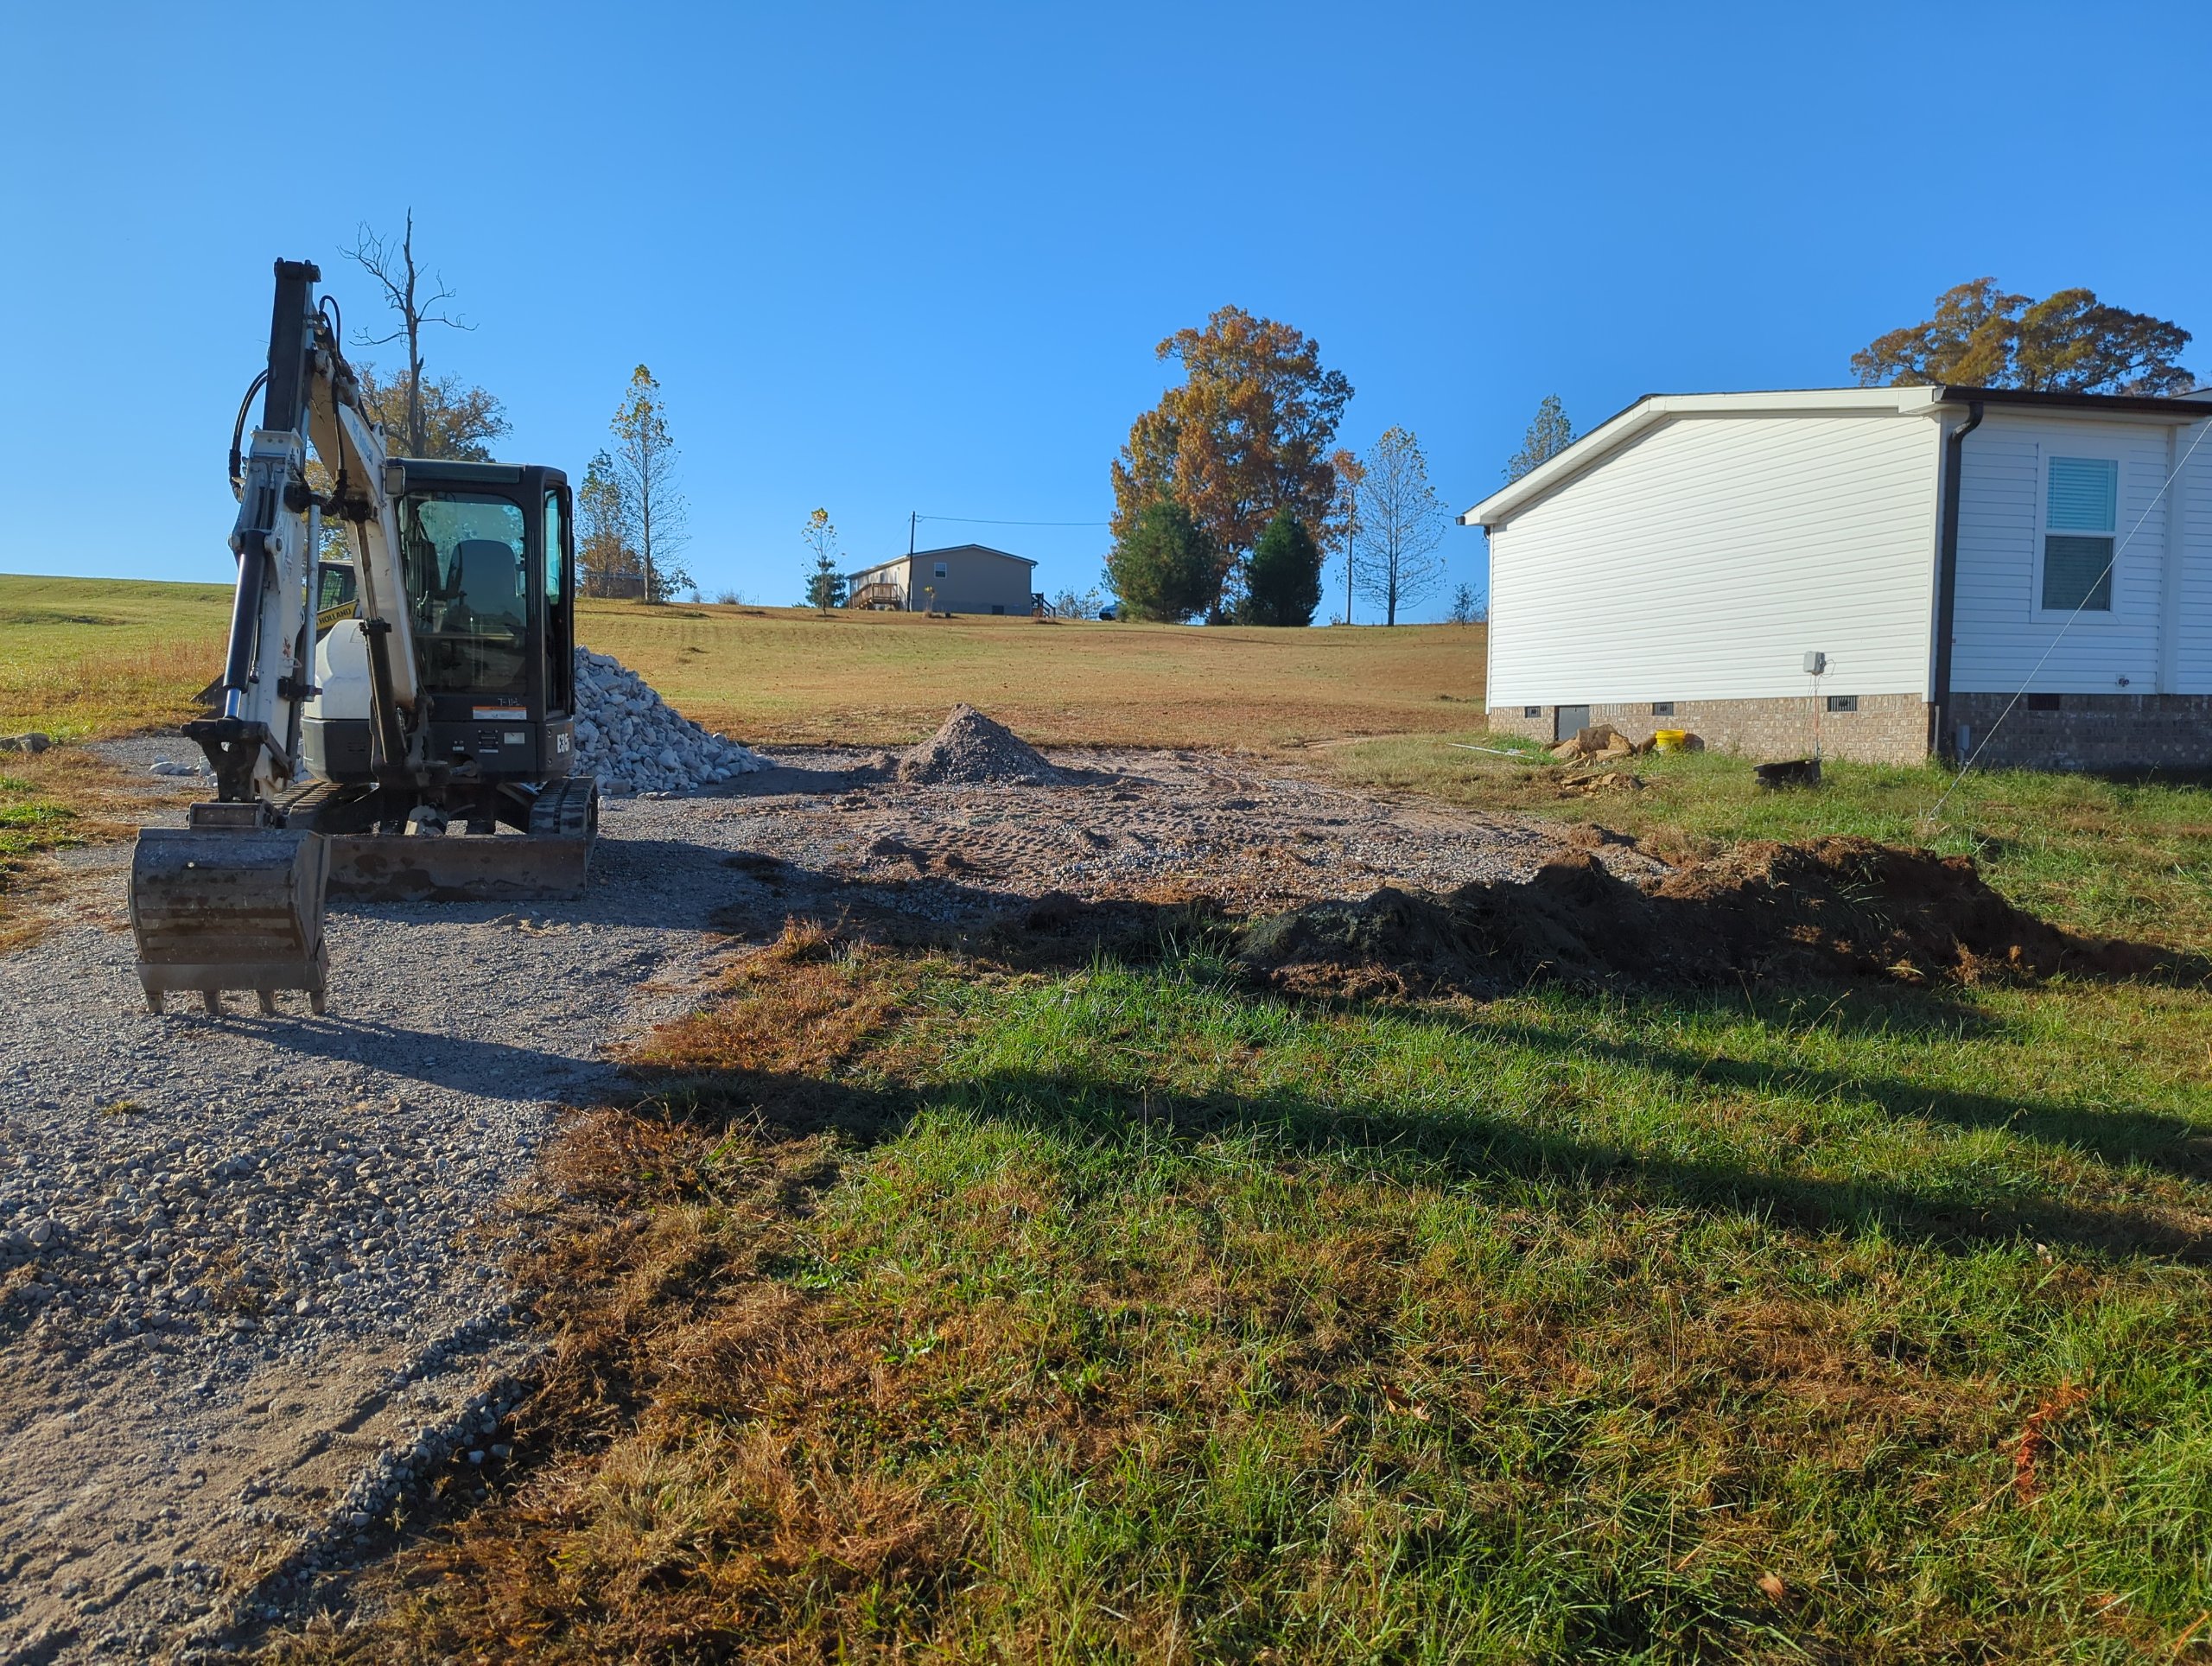
The surrounding grade was tied back into the drainage path so runoff could reach the swale naturally instead of spreading across the parking and driveway area. Topsoil, seed, and erosion-control blanket were used on disturbed areas where vegetation was the better long-term surface.
The parking area was also raised and expanded; the planned extension was approximately 12 by 22 feet. Suitable excavated material was reused onsite as subgrade where practical, then the finished parking surface was rebuilt with crusher run.
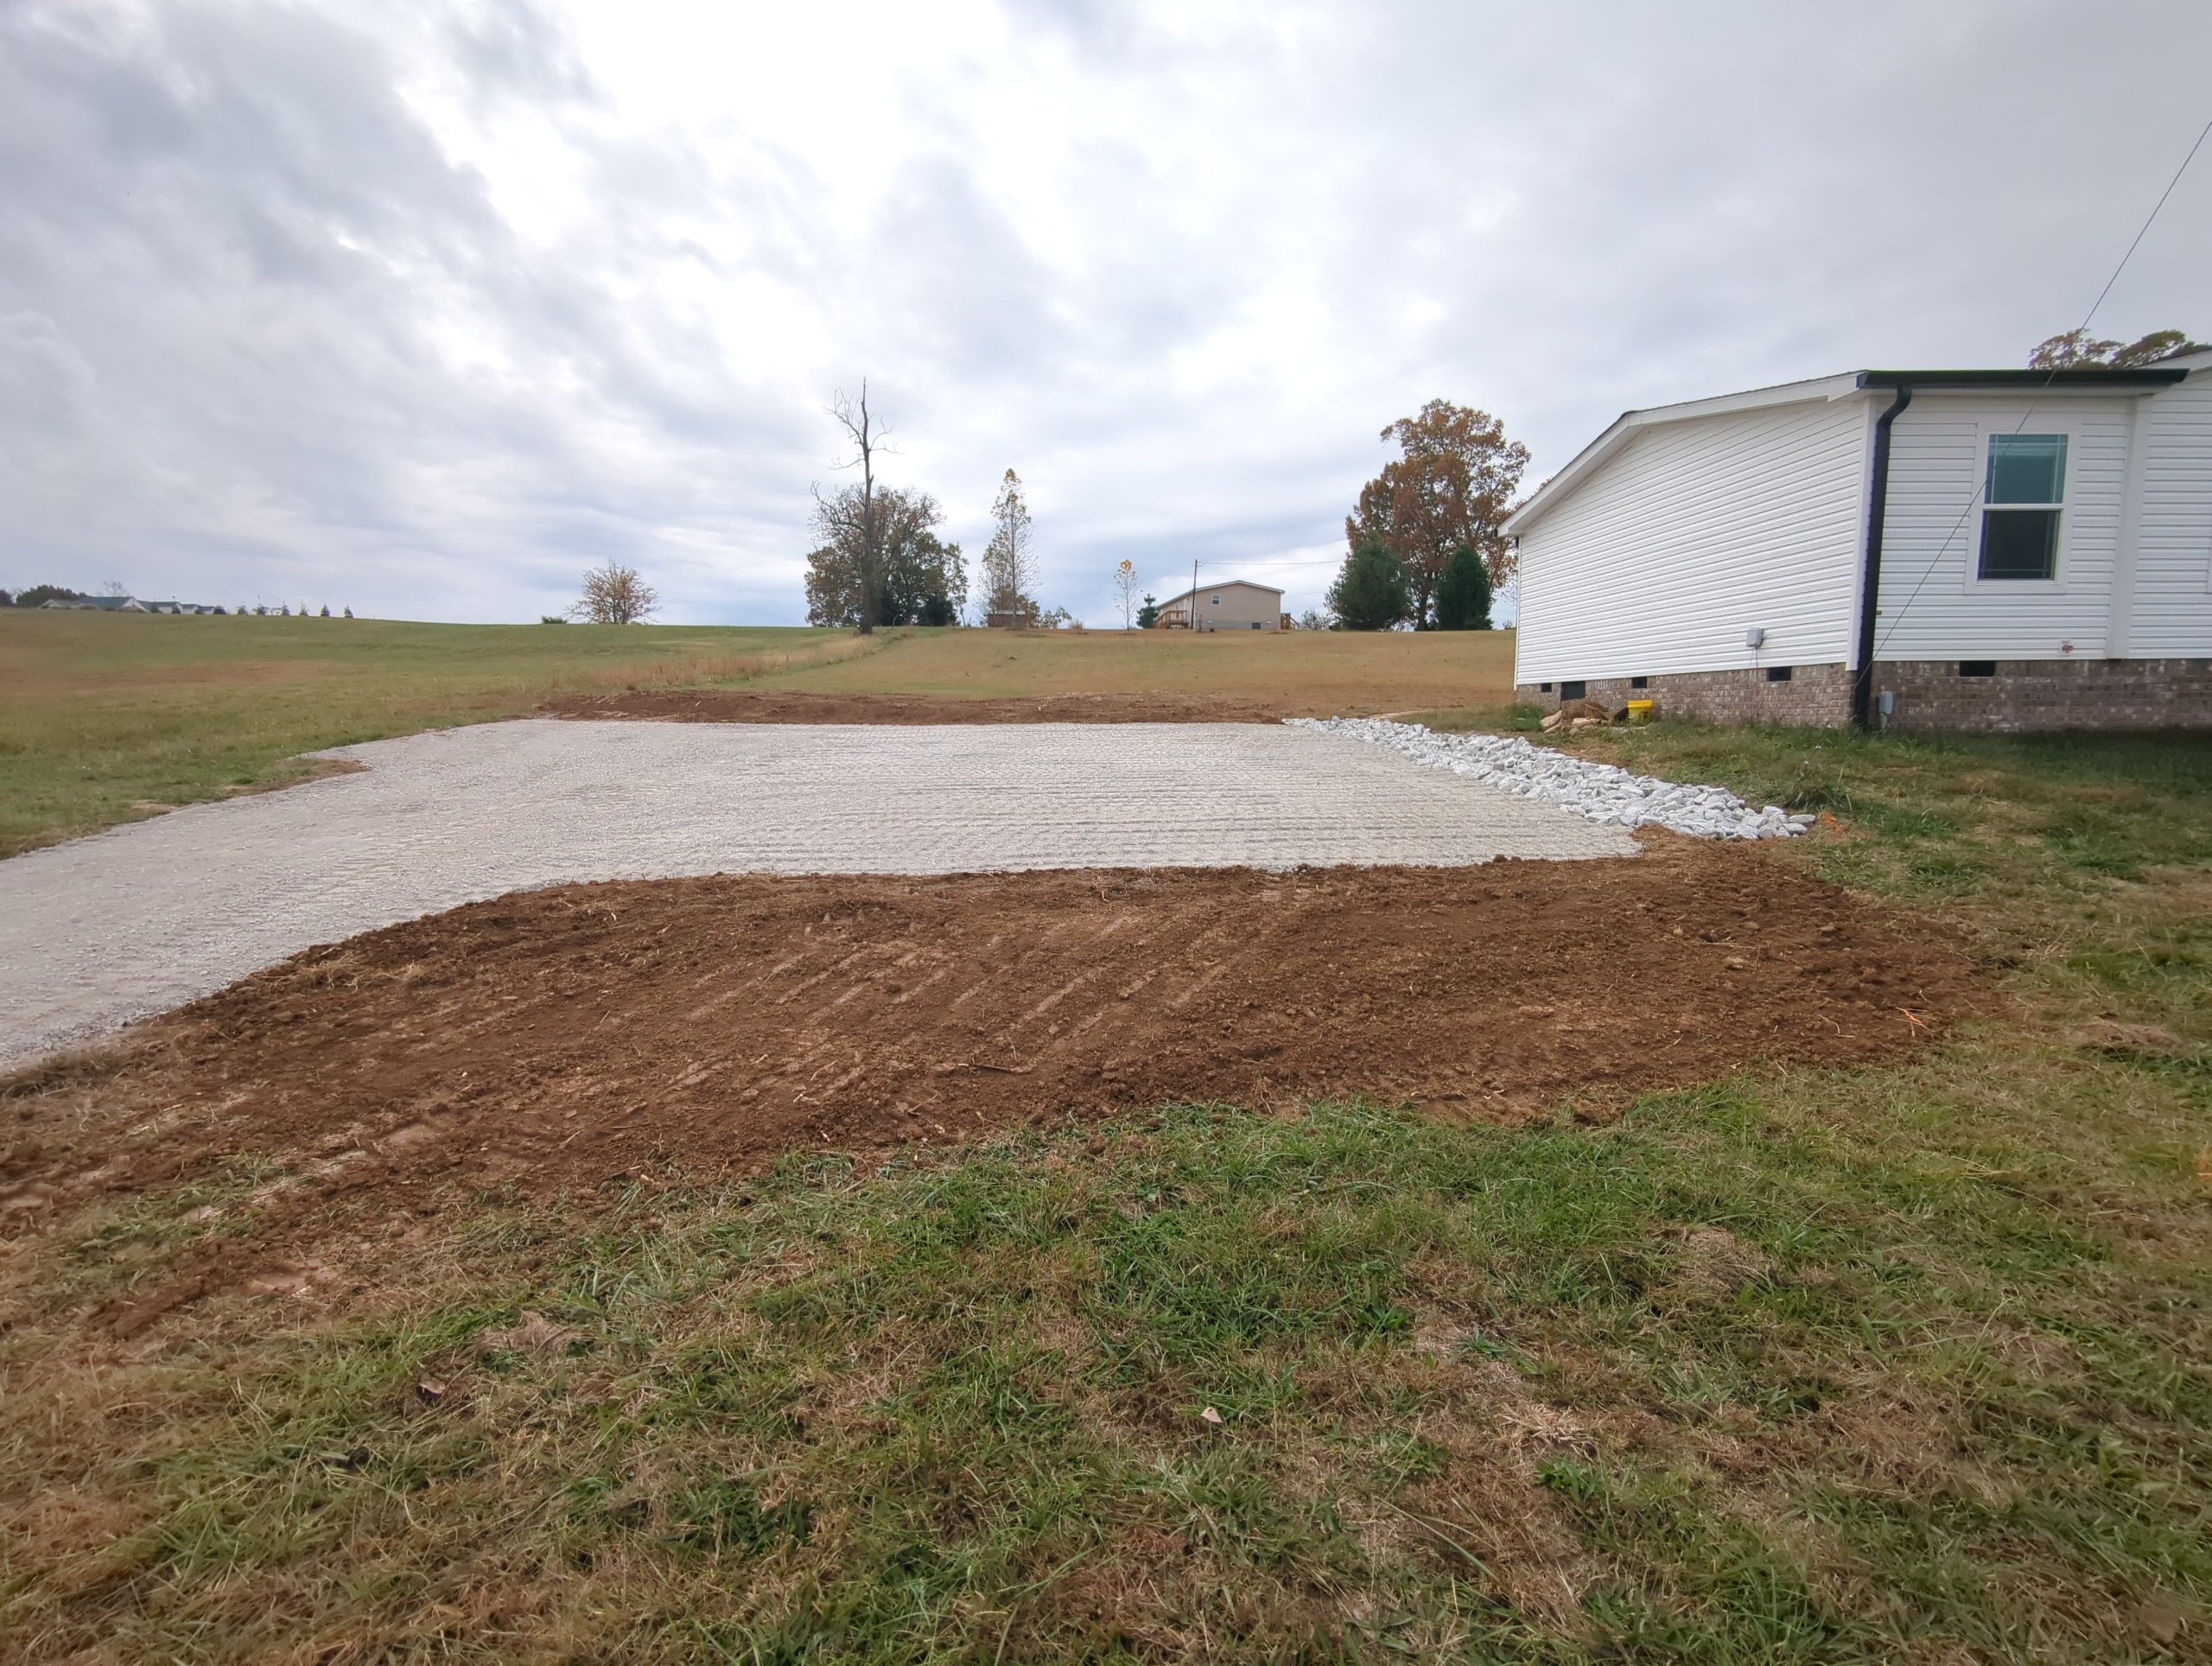
Drainage and driveway elevation had to work together. A drainage swale does not help much if the driveway beside it remains the lowest path for the water. This is why grading is part of the drainage work, not an afterthought.
Handling Overflow Along the Lower Driveway
The lower portion had a different problem. Runoff from neighboring grading was already being directed toward a drainage swale and driveway crossing, but in heavier rainfall the existing swale could be overtopped. Once that happened, excess water took the easiest available route: across the driveway.
Instead of trying to completely change the direction of that runoff, we created a more defined overflow route along the east side of the driveway. A new swale was excavated along the edge and an approximately 20- to 30-foot section, roughly 4 feet wide through the riprap section, was armored.
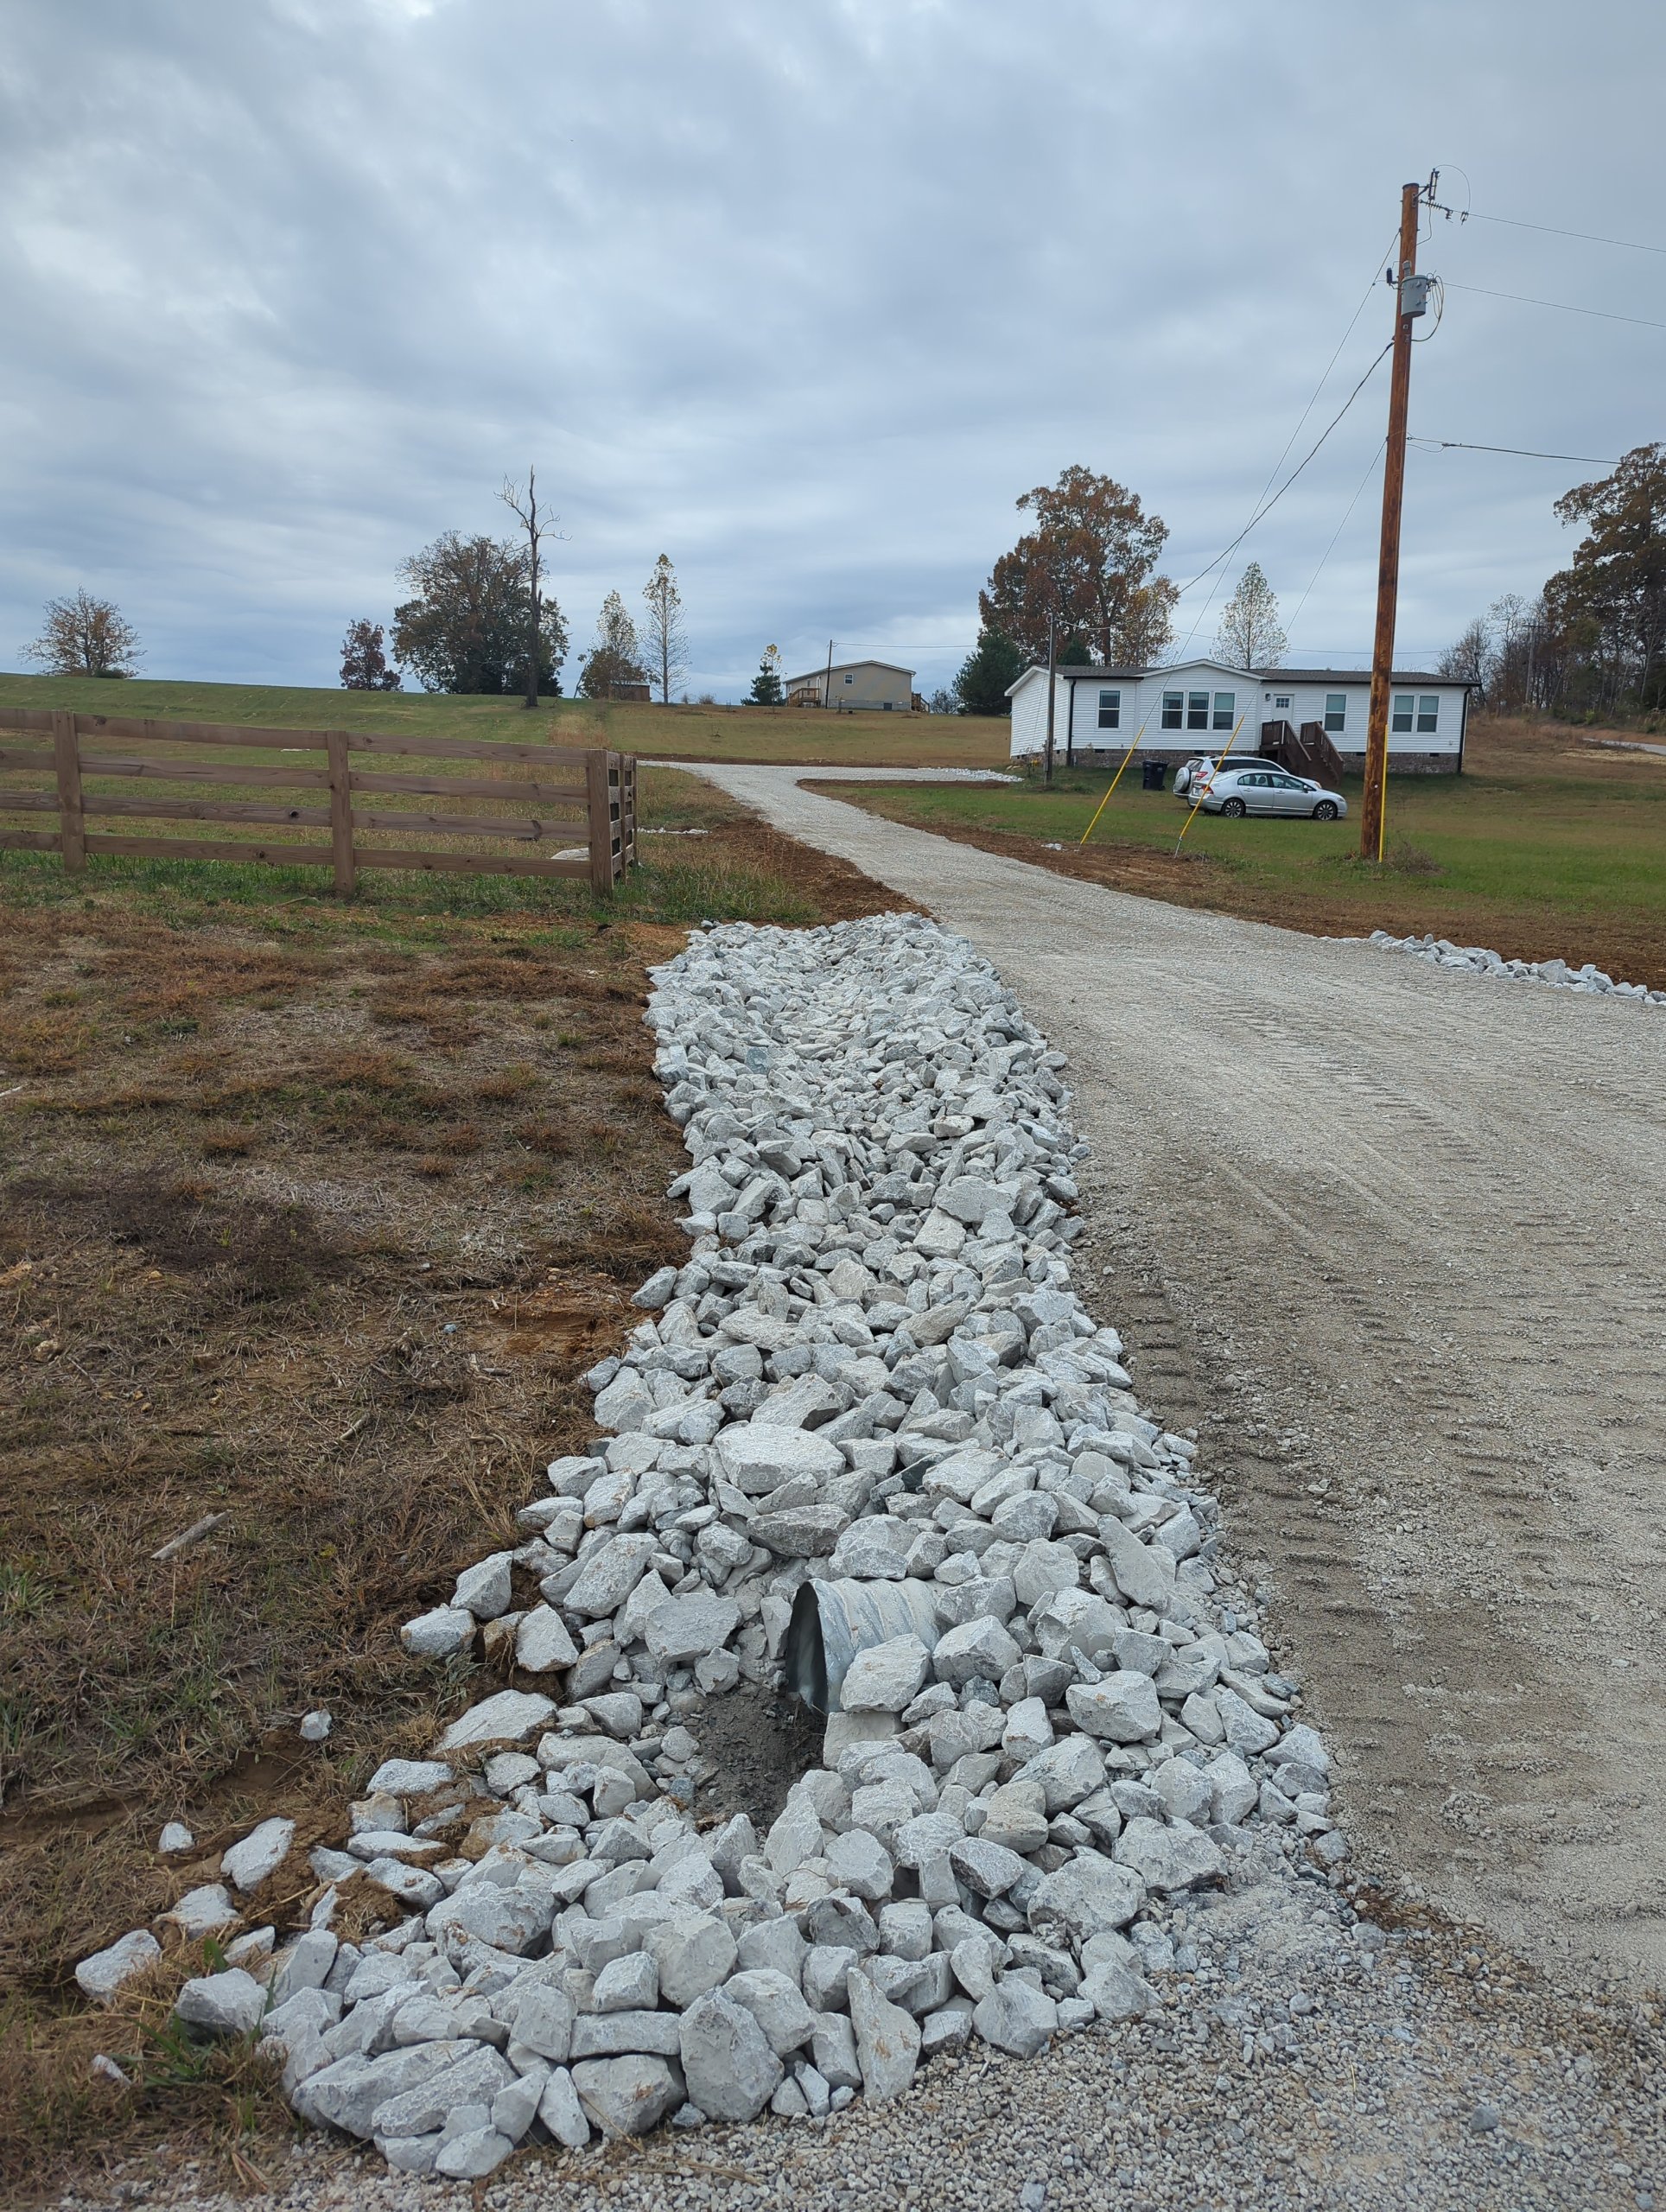
The driveway itself was raised and reshaped where practical so the gravel surface would no longer act as the easiest cross-property drainage path. The swale gave the water somewhere to go, and the raised driveway helped keep it there.
Rebuilding the Driveway Around the Drainage
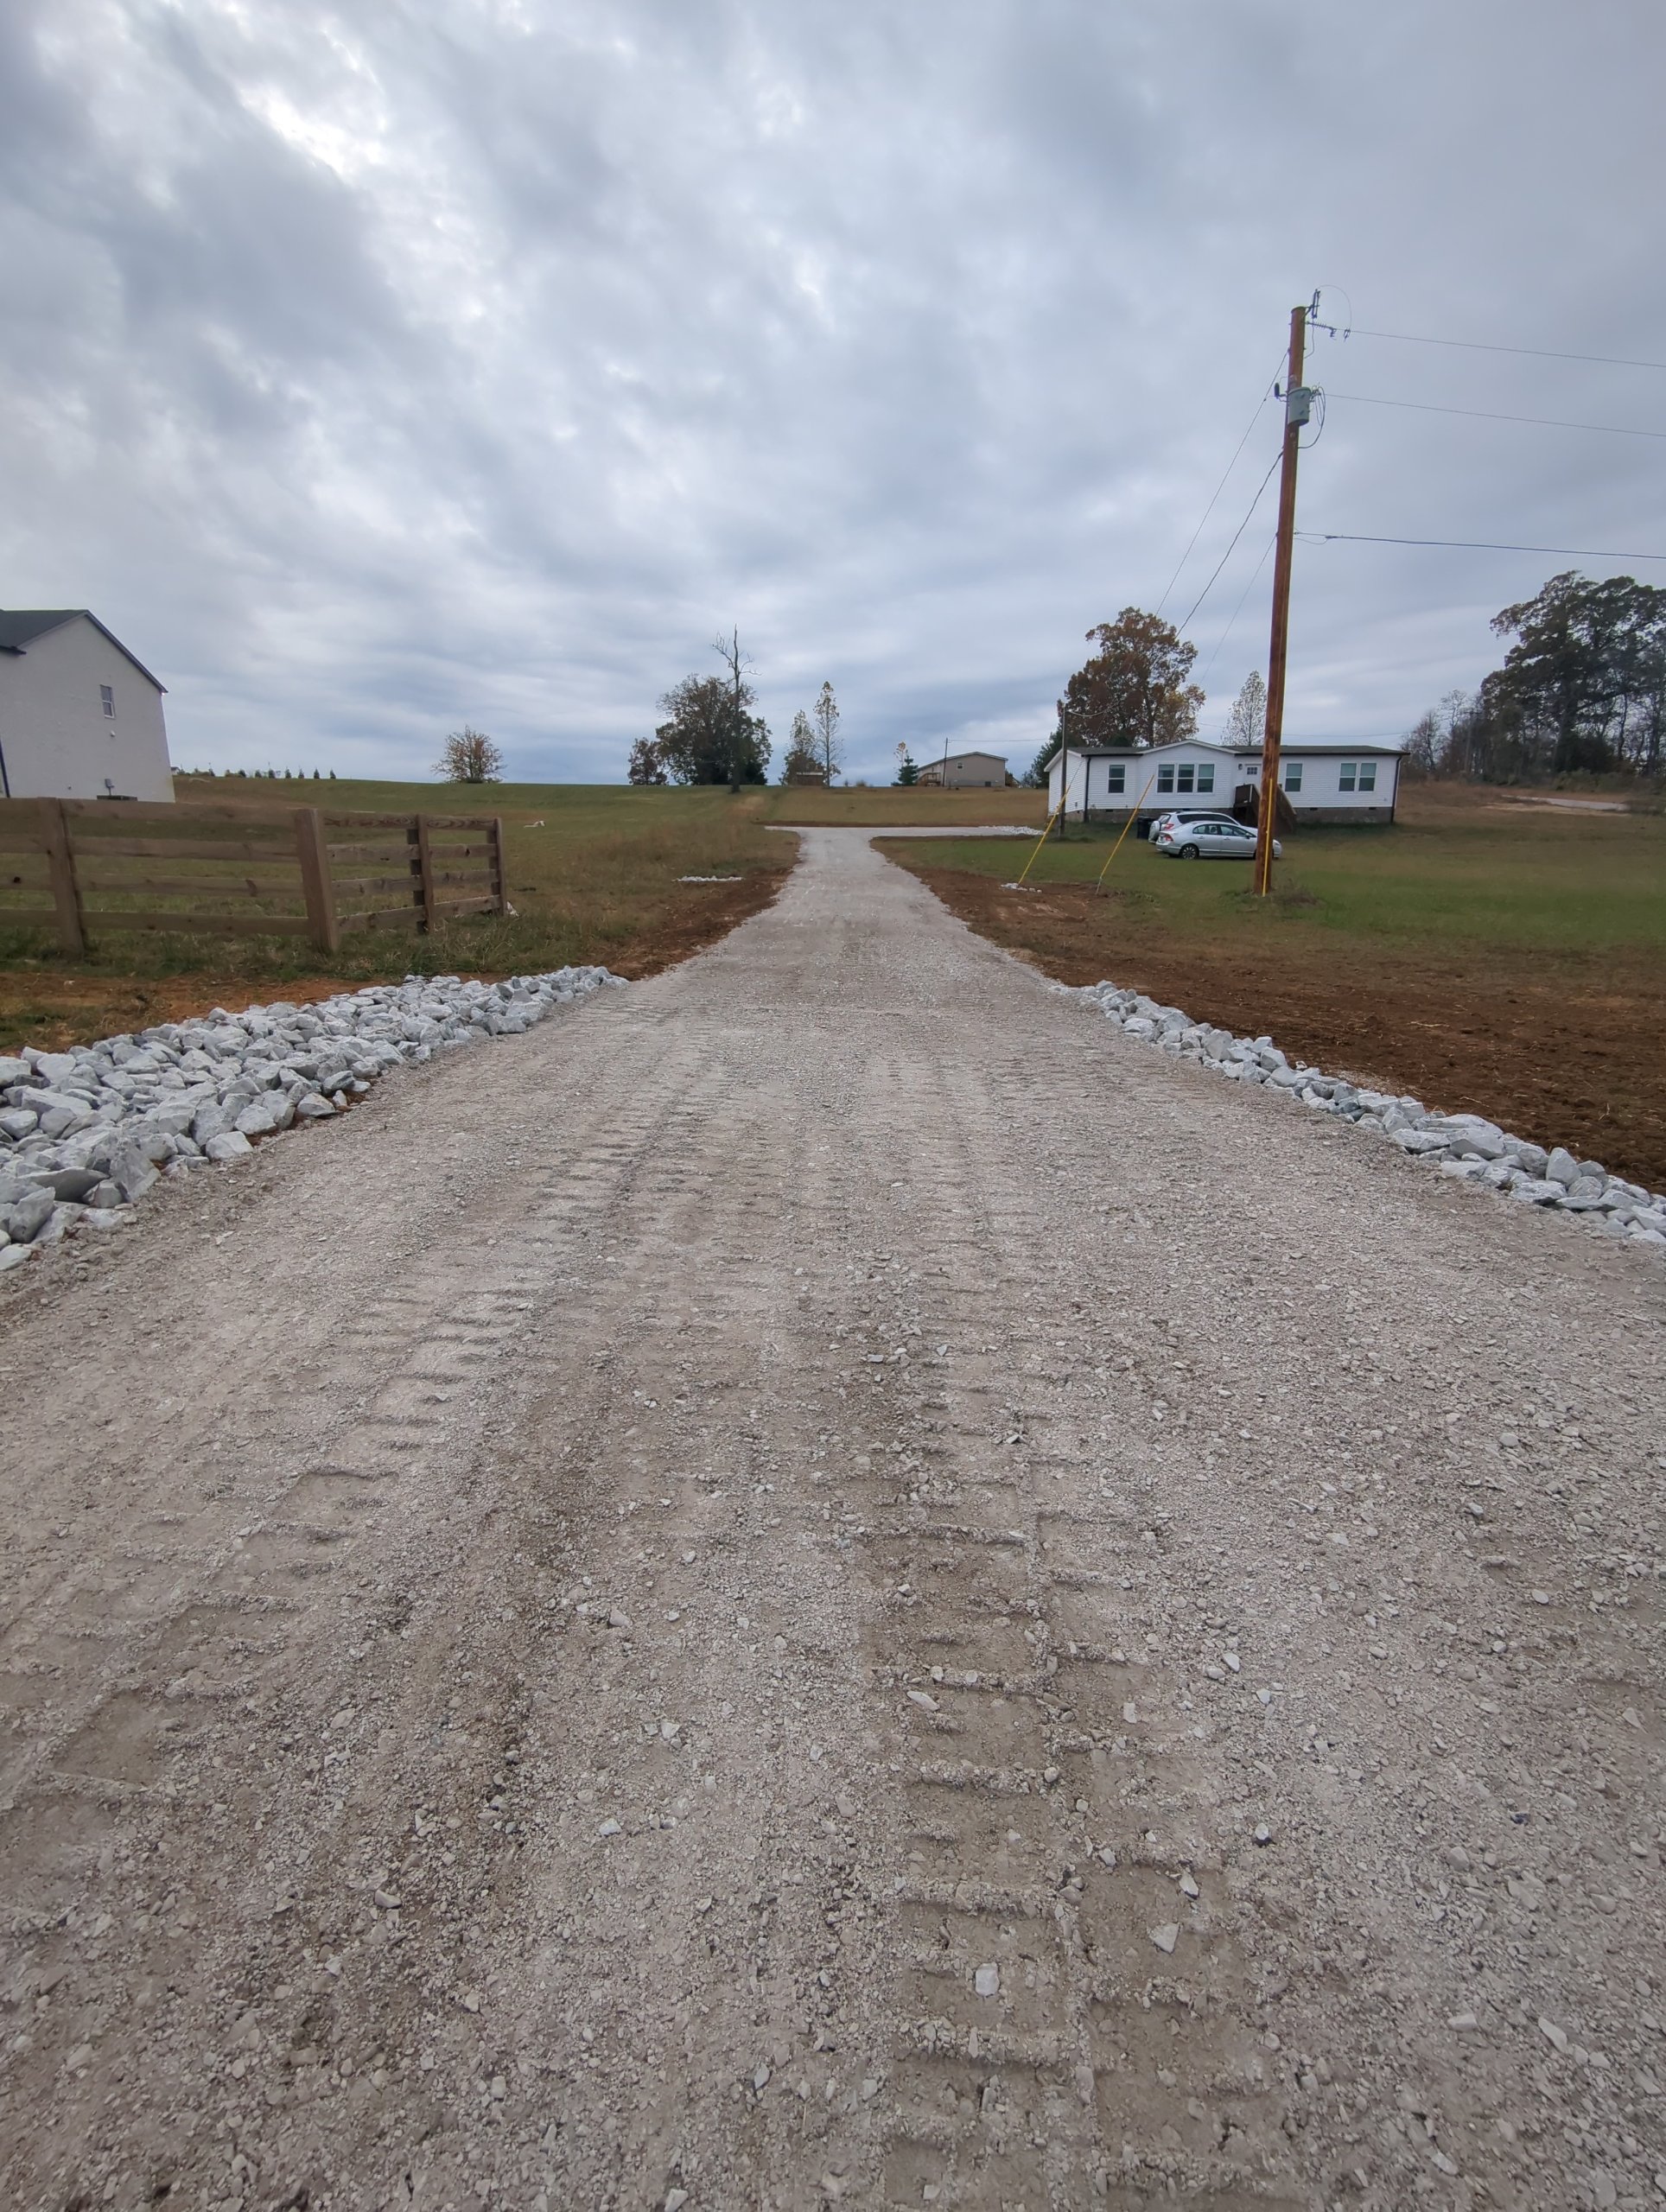
Once the drainage routes were established, the driveway could be addressed properly. Vegetation and loose organic material were removed from the existing driveway edges. Suitable existing aggregate and material were reused where practical as subgrade, and crusher run was added to raise and reshape the driveway.
The project originally allowed for up to two loads of crusher run because the finished amount depended on actual field elevations, compaction, and how much suitable existing material could be reused. That was planning allowance, not a measured final quantity.
This was not simply a resurfacing job. The driveway elevation was adjusted to support the drainage plan, especially where runoff had previously crossed the gravel. The finished driveway now works with the drainage paths instead of fighting them.
For a similar problem, our driveway installation and repair work starts with the water path. The Knowledge Center also explains soil and aggregate choices and grading for long-term drainage and access.
Stabilizing the Roadside Drainage
At the bottom of the property, runoff eventually reaches the roadside drainage system. That area had already experienced substantial erosion, including damage around the ditch and road edge.
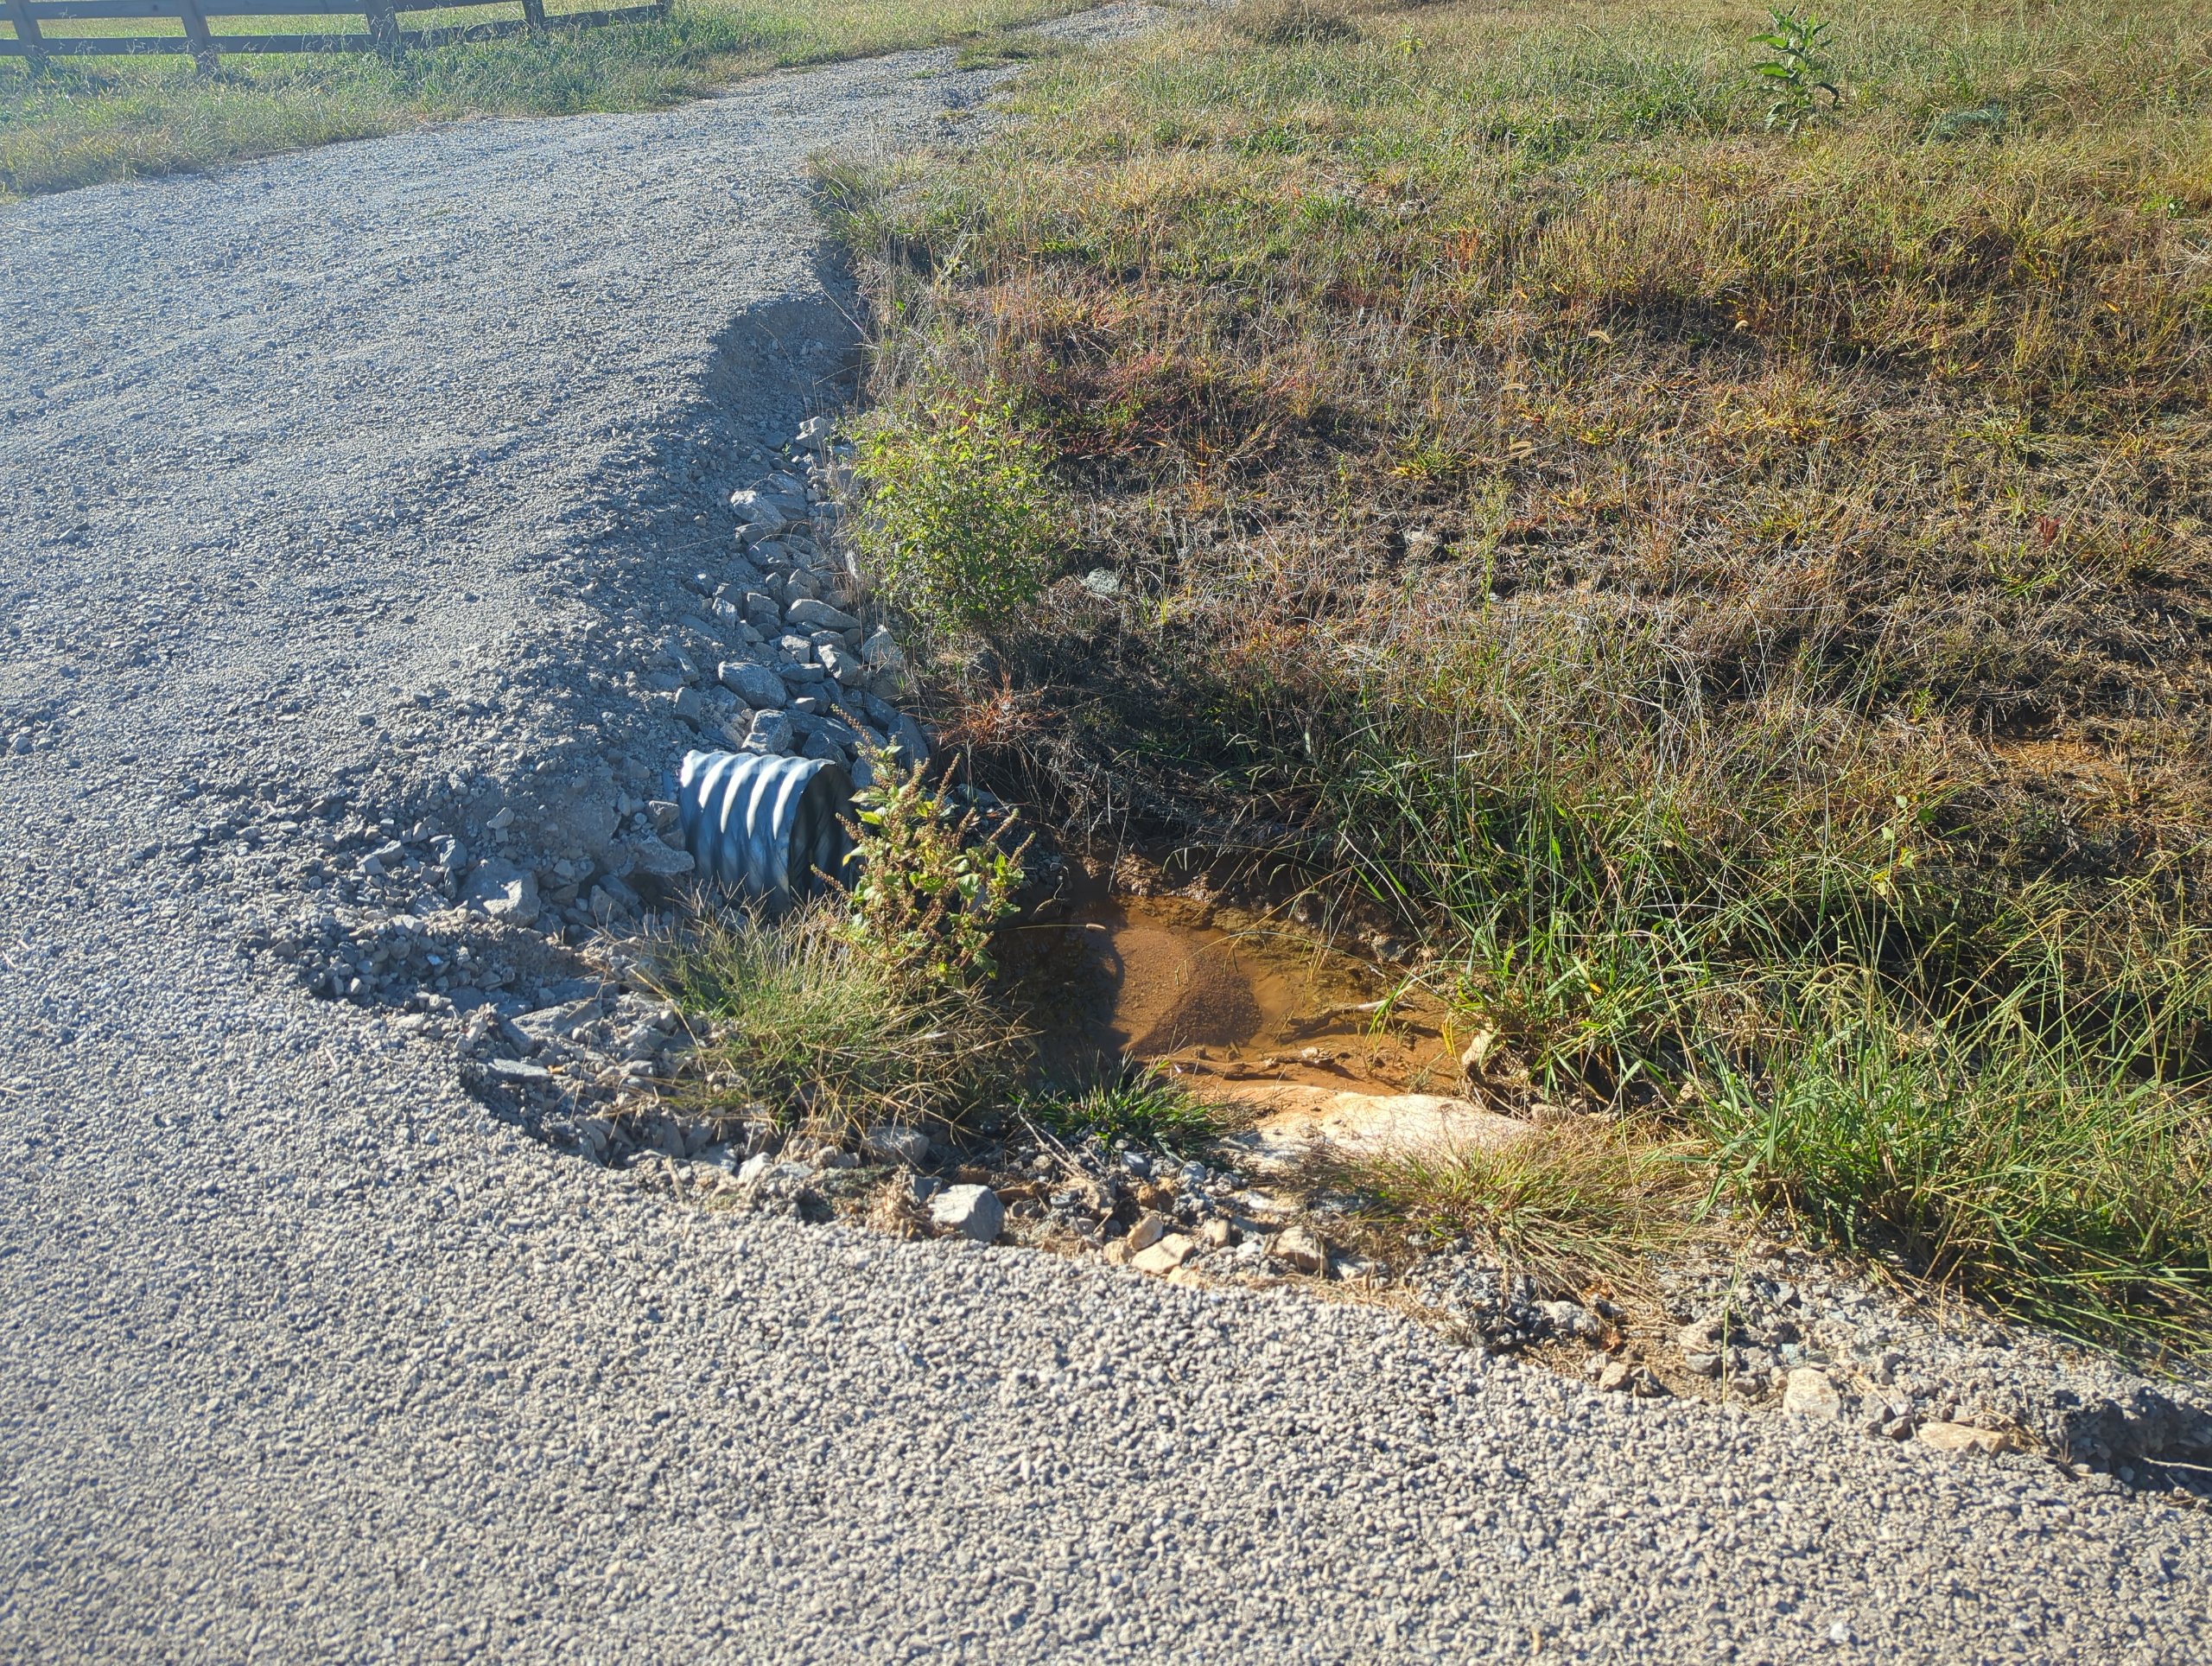
Because this work extended into a maintained roadside easement, I coordinated with the appropriate local road/stormwater authority before disturbing that area. Once permission was confirmed, the eroded sections around the roadside drainage were reshaped and armored with riprap.
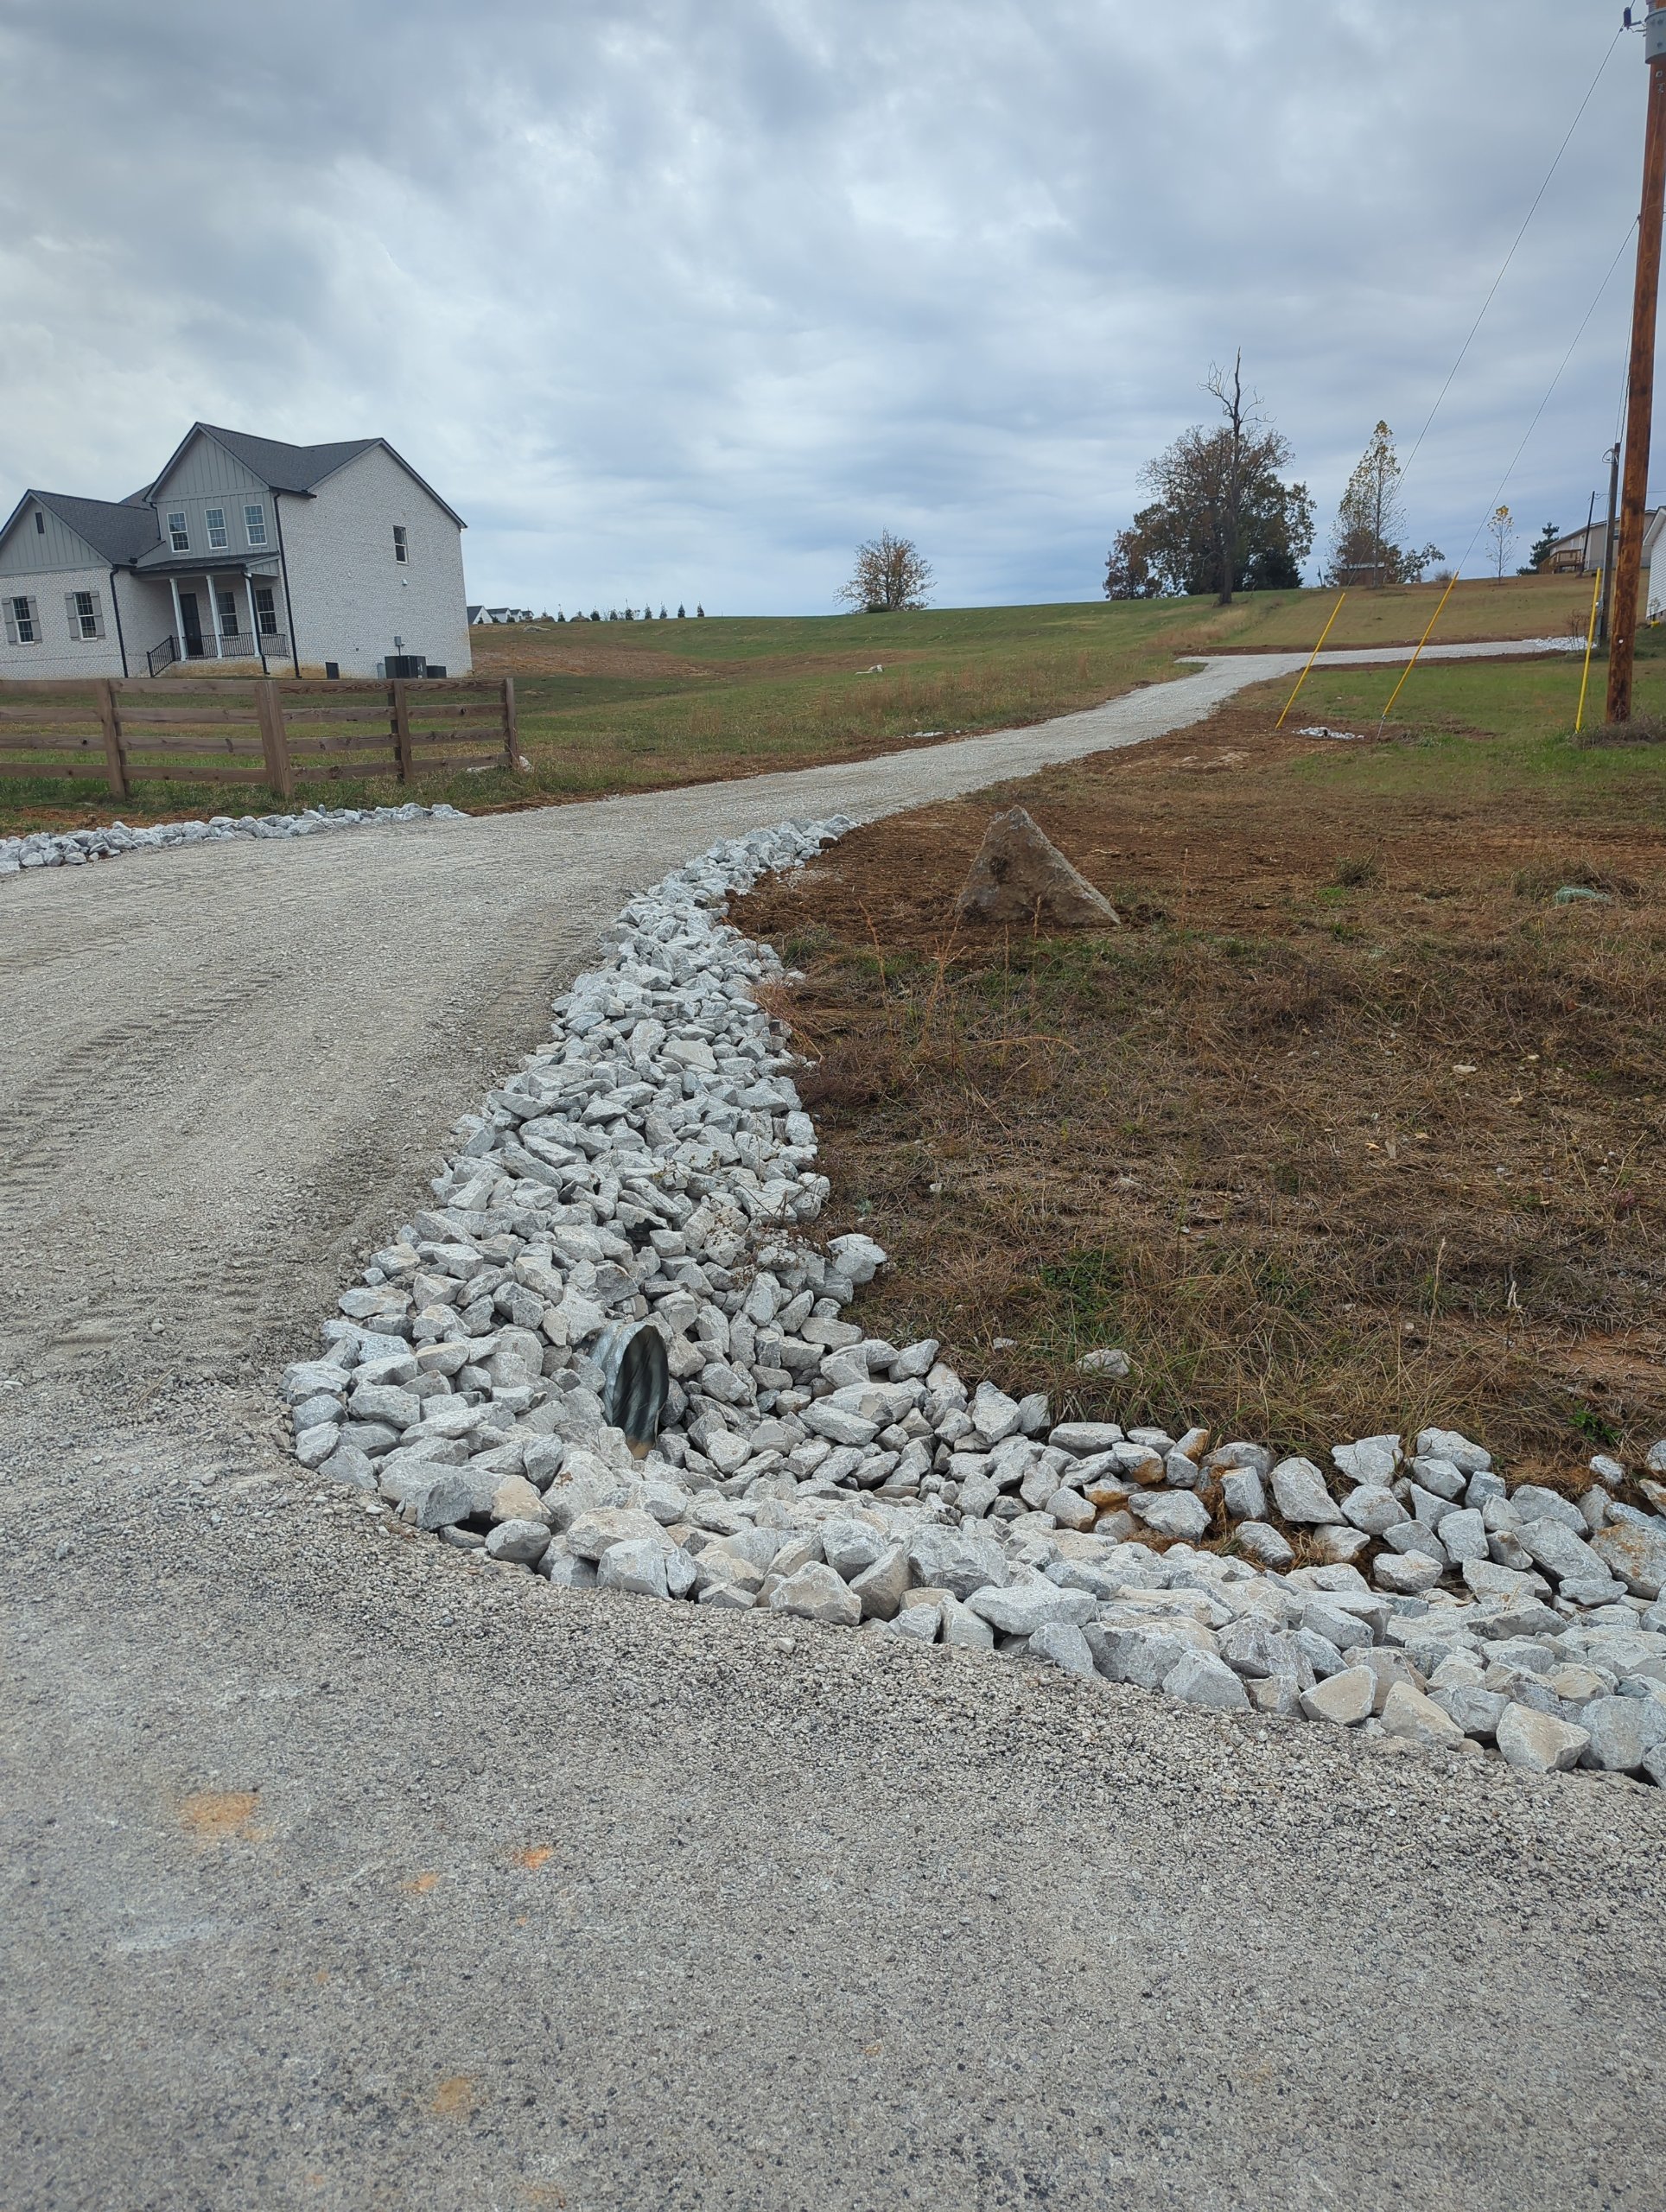
This gave concentrated runoff a more durable transition into the existing ditch and reduced the chance of continued erosion at the road edge. Riprap and restored vegetation had different jobs in the erosion-control plan.
Why This Solution Was Chosen
The biggest mistake on properties like this is treating every wet or washed-out area as a separate problem. It was all connected. The gravel was washing out because water was crossing it. Several drainage paths were poorly defined, the existing culvert was not working with the surrounding grade, neighboring runoff could overtop its intended swale, and the roadside outlet was receiving concentrated flow without enough protection.
The solution was not one giant pipe or one deep ditch. It was a series of smaller corrections that worked together:
- Reshape the upper drainage area and create a defined house-side swale.
- Reset the existing 12-inch culvert to work with the grade.
- Create an overflow swale along the lower driveway.
- Raise and reshape the driveway and expand the parking area.
- Armor concentrated-flow areas and stabilize the roadside outlet with riprap.
- Restore disturbed soil with topsoil, seed, and erosion-control blanket.
Earlier quantity planning included approximately 2,500 square feet of seed and blanket. The restoration materials included topsoil, seed, erosion-control blanket, and staples; riprap, geotextile, and crusher run served the drainage and driveway portions of the work.
That is the drainage-first part of the job. The driveway improvement came after the water had a better route.
We did not try to send runoff into a different watershed or simply bury the driveway in fresh gravel. We worked with the existing runoff direction, defined and armored the paths, corrected the culvert’s grade and alignment, and then raised and reshaped the driveway around those paths.
Project Services
- ■Residential drainage correction
- ■Swale excavation and grading
- ■Gravel driveway repair and regrading
- ■Driveway elevation correction
- ■Culvert correction
- ■Riprap erosion protection
- ■Parking-area expansion
- ■Topsoil and finish grading
- ■Seed and erosion-control blanket
- ■Roadside drainage stabilization
Completed Result
The finished project changed the way runoff moves through the property without trying to send the water somewhere it did not naturally belong.
Approximately 35,000 square feet of upper drainage area now has a defined route toward the house-side swale instead of simply entering the driveway. The separate approximately 74,000-square-foot lower contributing area has clearer paths through the lower drainage system, existing culvert, defined overflow route, and roadside ditch. That is not a pipe-capacity guarantee.
The gravel driveway was raised and reshaped around those routes, the existing culvert was corrected, concentrated-flow areas were armored with riprap, and disturbed areas were restored.
The biggest improvement is not just that the driveway looks better. The water now has a clearer, more erosion-resistant path. That gives the driveway a better chance of staying that way; it does not eliminate runoff or promise performance in every storm.
See another Spring Hill raised-driveway and stormwater project, or explore our work in Spring Hill, Tennessee.
Correct the water path before rebuilding the driveway.
If runoff is crossing your gravel, washing stone downhill, or eroding a ditch, I’ll walk the property and trace how the drainage and driveway grades work together.
Frequently Asked Questions
Learn more about this type of project in our Frequently Asked Questions.
Visit our Frequently Asked Questions